Monday, 6 June 2016
Texturing Cont.
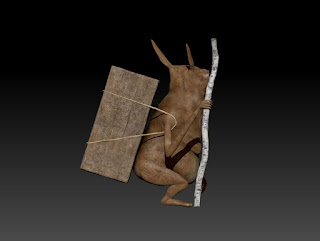
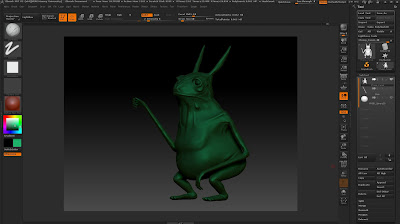
I already knew about to Polypaint but I learnt some new techniques from these tutorials.
Really bad lighting but you get the idea.
Really bad lighting but you get the idea.
Saturday, 4 June 2016
Texturing Experiements
Friday, 3 June 2016
Finalized name of Character
My character is heavily based on frogs so I decided to play on that idea when deciding his name. I thought of using Google Translate to translate frog to many languages and chosing the best sounding name. I thought this was a little boring so I decided to have a small twist on it.
Because my character is a collector or horder I wanted to incorporate that into his name also.
I decided to use only the Danish and Norwegian languages. I choose these languages purely because these are my ancestry.
Frog in Norwegian is Frosk and hord (horder isn't translated) in Danish is Slid (pronounced Slil).
My final name for my character is Slidfrosk -Slil-frosk
Final Sculpt
Youtube loses a lot of the detail in the turntable but this is the general idea of my sculpt.
Wednesday, 1 June 2016
Kettle
Adding details to my props (export OBJ files from Maya to Zbrush) and gave my kettle the bronze look. dayum
Lighting and Render Experiment, Pre-Poly painting
Test lighting and render completed by Zbrush. Photoshop compositing. No background.
Tutorials Lighting, rendering, photoshop compostiting
Researching lighting, rendering and photo compositing
Tuesday, 31 May 2016
Monday, 30 May 2016
More Experiments
Testing all my newly made alphas. Not final model just test on Textures.
- Need to made the details more prominent so my alphas show up more clearly
Thursday, 26 May 2016
Alphas Used on Sculpt
Because my creature is a reptile I researched difference types of reptilian scales and skins. I also reference elephant skin for more wrinkled areas.
Animals Used:
Animals Used:
- Elephant
- Crocodile/Alligator
- Snake
- Toad
- Lizards
Wednesday, 25 May 2016
Tuesday, 24 May 2016
Feedback on Creature
- Create sag under the armpit (look at Iggy Pop for reference)
- Make stomach more saggy
- Thicken up thighs
- Think about belly buttom
- Detail around the eyes (tearducts etc)
- Think about final pose (tilt head towards camera, lean character forward slightly)
- Look at mouth references
Monday, 23 May 2016
To Do: Sculpting
Total progress so far on creature.
To Sculpt:
- Hand holding branch
- Feet
- Ears
- Make asymmetrical
- Add details around his armpits (where the ropes dig into him)
- Skin detailing
Decimation Master
My polycount was crazy (I don't even want to say what it was because it's embarrassing...) It was effecting my polypainting (really slow etc)
Tutorials Used:
Tutorials Used:
- http://pixologic.com/zbrush/features/decimation/
- http://pixologic.com/video/video-v2.php?videoname=http://www.pixologic01.com/zbrush/features/decimation/Decimation_master_demo.flv?w=860&h=577
Sunday, 22 May 2016
Creating Alphas from Images
Before clicking DragRect brush. When FreeHand is selected is doesn't create smooth textures.
Alphas used with DragRect. Used to drag out and size the alpha onto the mesh.
Texturing Full Model Tutorial
In the ZBrush I was using there was no Surface drop down option so I went into the Zplugin menu and clicked UV Master, Unwrap to get those option back in Zbrush.
Tutorial:
Playing around with the settings. But when projected onto the mesh, doesn't wrap around it nicely.
Not yet applied to the mesh so it is more bold. The texture also moves and adapts itself to the sculpt when altered.
Applied to the mesh, a very subtle texture compared to before.
When it is applied to the sculpt the texture doesn't adapt to the model anymore.
Tutorial:
Playing around with the settings. But when projected onto the mesh, doesn't wrap around it nicely.
Not yet applied to the mesh so it is more bold. The texture also moves and adapts itself to the sculpt when altered.
Applied to the mesh, a very subtle texture compared to before.
Wednesday, 18 May 2016
Tuesday, 17 May 2016
Creature Studies
I wasn't happy with the original design of my characters face so I started drawing new deisngs. After talking to Tanya I decided to go straight into Zbrush to sculpt different faces and develop the face from there.
Thursday, 5 May 2016
Starting Creature Over
I decided to start over my sculpt as a new start. I didn't like sculpting from a loose tpose as originally suggested. I came across more problems doing it that way and since I am having my creature one pose for the final (and it won't be animated) I didn't see the point of sculpting from tpose.
Starting Over:
The adaptive skin was bunching up in his armpit and is really bad to sculpt from. So I found a tutorial on ZRemesher. ZRemesher is meant to change the topology in the sculpt to a better form. Its good for creating edgeloops etc. I used it to fix the armpit area on my sculpt.
Tutorial Used:
Sculpt after ZRemesher. Its an improvement from before. The topology in general is terrible but for sculpts it doesn't matter. If its going to be animated, the topology is really important then.

Subscribe to:
Comments (Atom)


